


I've been thinking of a way to incorporate something new into Ruby's side of the room that was playful and could bring in more color and texture since we are renters and can't paint. I used to have a large painting up above her crib but she was able to knock it off at our other house and I'm not willing to have it fall on her head anytime soon. I've had a few extra arrow rattles that I designed for Red Velvet Art last year floating around the toy box and it hit me yesterday to make another and string them together as a garland!
SO, here's a simple tutorial and pattern to make your own arrow plush garland (or mobile). You'll need: 13" x 13" of fabric per arrow, a cut of fabric measuring about 3" x 44" to string them together, sewing machine (optional), stuffing, a needle and thread, scissors, access to a printer, pen.

Print out the template at the bottom of this post or create your own arrow shape. I traced mine onto card stock but it's not necessary. Cut out your shape and place it on your fabric. I used a vintage gingham that was a little see through so I added some white sheeting to the back. Trace around the stencil onto your fabric and cut it out. Repeat with as many pieces as you need for your garland.

Place your fabric pieces on top of each other and pin together with right sides facing each other.

Starting from the center on one side, stitch all the way around the arrow leaving about 1/4" from the edge for the seam allowance and stopping about 2.5" from where you started. Trim your corners and make little v-shapes in the inverted corners but be sure not to get too close to your stitches. If you don't have a sewing machine you can hand-stitch your arrow closed using small stitches.

Turn right side out and stuff. Stitch closed with your needle and thread when finished. Repeat with the rest of your arrows.

The arrow I made yesterday is a little different than the originals but I've shared the template with the original design so your arrows will look more like the pink and blue ones.

Cut your long strip of fabric into three strips and braid them together leaving about 4" of loose fabric from the end. If you're using more than three arrows you'll want to make two braids.

I cut my braid into four pieces and hand-stitched the ends onto the backs of the arrows.
I then attached it to the wall high enough for Ruby not to be able to pull down with two screws. We have plaster walls so I pre-drilled holes and then added small screws that I covered with part of the braid so it wouldn't show. We've had plenty of cloud coverage this week so even with two big windows in their room, it was a little dark in this corner. Here's a little peek into how things are shaping up in there!

Here's the pattern I used if you'd like to make your own plush arrow garland. I think this would be equally adorable if they were stacked one on top of another and connected from the middle of each arrow so that they spun around as a mobile.
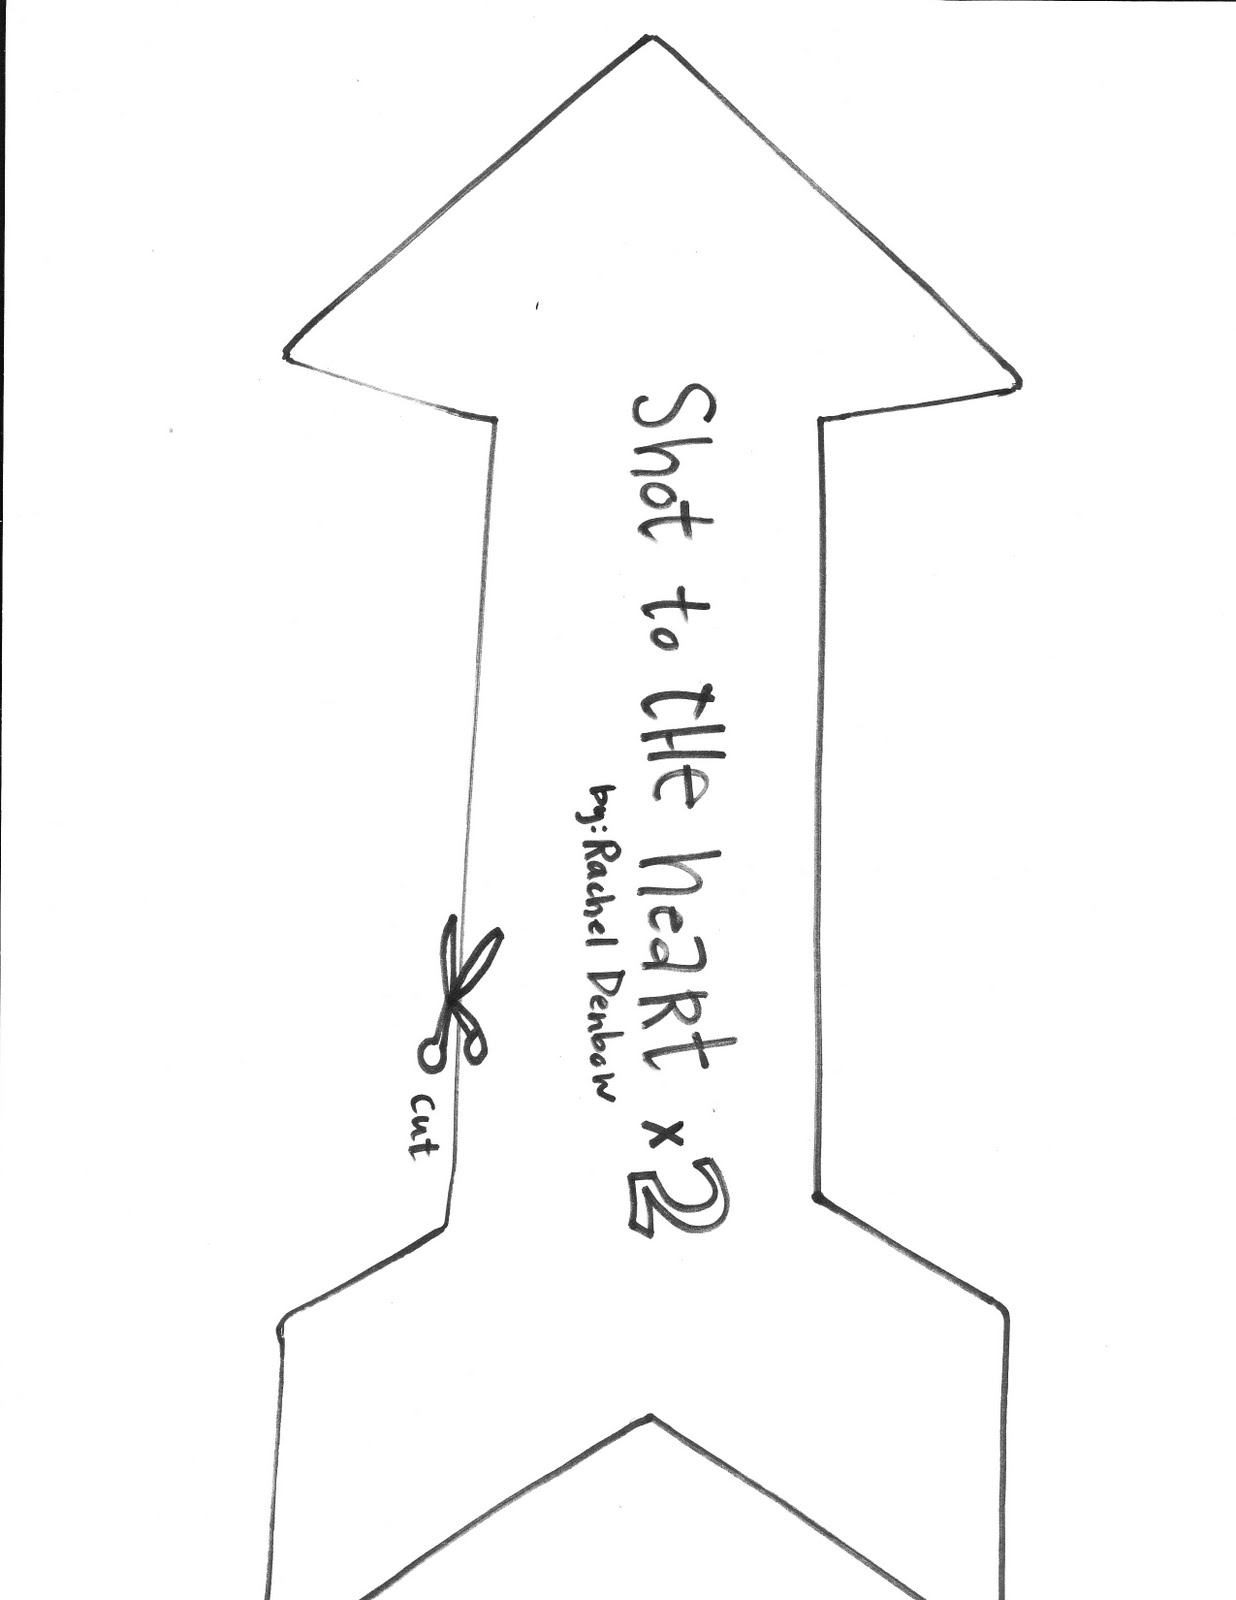 (Pattern and garland for non-commercial use only please.)
I'd love to see your version if you make one. It's super easy and would work well for a boy or a girl depending on the fabrics you choose.
I've got a fun giveaway coming tomorrow and it's Project ReStyle day!
xoxo,
Rachel
I've got a fun giveaway coming tomorrow and it's Project ReStyle day!
xoxo,
Rachel


22 comments:
Oh, it's just so so pretty! I want to make a Valentines day one right this very minute!
Ohhh, I love them. I need an excuse to make them for grown ups
so well done.
this is so stinkin' cute. My little lady has so many awesome things on her walls but big brother is left behind with a simple banner. Might have to make this with 'boyish' fabrics for him! Great tutorial!
Sarah M
oh my gosh...this is so perfect. i just bought a dress basically for the material and have been trying to figure out what to do with it. this would be perfect! (and even though i haven't really thought about the details of sewing it yet...i'm thinking it might be ok for an extreme beginner like me?)
Tamara,
Yes, totally easy for a beginner project! Totally!
That is really pretty! I might make this sometime!
You are very cleaver and I love that you share your awesome ideas! SOFT art is a good thing. I am a big fan of quilt samplers for that very reason. But I was just thinking, I should make a quilt sampler out of my favorite baby clothing pieces that are too small now... hmmm
adorable! i cant believe its time for valentines day already... bah.
great idea! it looks great in that room! you are so creative. thanks for sharing!
ohmygoodness Rachel, this is so cute! And I was just trying to decide on a mobile to make for my kiddos room. This will be perfect I think. Adorable!
So great!! Thanks for sharing!
I just love the idea of taking small plushies and making them into garland. Love this project!!
Gorgeous! Can't wait to make some for my little girls for Valentines day. Thank you
Me encanta!! lo copio! a ver si me animo! un beso!!!
how darling! so creative rachel.
i want to make this!! so cute!!!
I love it! So adorable!
This is so cute! And I love the rest of her room...it is so happy! :)
~Elizabeth
Love this!! featured it on my blog, here: http://punkprojects.blogspot.com/2011/01/make-it-monday_24.html
-Katie
Fun and different!
Such a cute idea!
Post a Comment